Showing posts with label eyeliner. Show all posts

Thursday, 5 July 2012

Comparison/Review: MAC and Revlon Double-Ended Liners!

Hello again everyone!
I recently picked up a double-ended liner from the MAC Beth Ditto collection and I noticed Revlon has come out with some double-ended liners as well.
I bought one that had similar shades to the one I owned from MAC and as promised- here is my review and comparison!


Top: Revlon "#201 Torch" Smoky Shadow Stick -$8.99
Bottom: MAC "Beth Mask" Shade & Smoke Shadow/Liner- $27.50 (ouch).
Both have a pinky-champagne end and a darker brown-plum side. 
Both products are made to be worn alone but can also be worn under powder shadows as a cream base.
Let's start with the MAC double-liner. 


The double-ended liner in "Beth Mask" is a beautiful, creamy liner and shadow duo that came out recently. Both ends glide on really smoothly without tugging on your lid and have great colour payoff. I really like how slim the packaging is and that both caps snap on, so they keep air out which will stop the product from drying out.


One end, the pink side, is angled (which is a little less noticeable because I have used it a lot recently) and the plum side is rounded. I would have preferred the plum side to be angled because it would be easier to use in your crease and as a liner. I would assume most people would use the darker end as the liner and the lighter end as the shadow, right?


This is however one of the best plum-brown cream bases I have ever used. I really enjoy this colour.

Next: the Revlon Smoky Shadow Stick!


You can see the obvious similarities to the MAC version right off the bat. One pink shimmery side, one darker smoky side. I really like how this product glides on effortlessly, just like the MAC. It's much fatter than the MAC version but that doesn't really bother me. What does bother me is the cheap packaging, especially the caps for the liners. They are flimsy and I've had liners with caps like these before and they are VERY prone to breaking. Which really sucks if they do because as mentioned above your product will dry out. They also snap on but it's not a tight fit like the MAC version. And as a personal thing, I don't like that they are clear. They get dirty and the liner smudges are very visible which looks bad. 


The Revlon stick has it right in my opinion, with the darker side being angled and the lighter side being round. This is much more brown than the MAC rather than plum, but it's still a beautiful, rich, dark brown.
Again, I have to say I don't like anything about the packaging of this one. As I was taking a picture of the pink side, the entire brown side fell out! I put it back in and it stuck but I mean, I've only had the product for two weeks, there's no way it should be falling apart.  


To be quite honest, I don't love this side of the Revlon shadow stick. It looks pink in the packaging but as you will see in a swatch it looks very white and ashy on my skin tone. That's not to say however, that it wouldn't look great on lighter skin tones, but you'd have to try it for yourself to really find out I guess.

Top Row: MAC
Bottom Row: Revlon
As you can see in swatches, the pink side of the Revlon stick is very white looking as opposed to pink. I left the swatches on my hand all day, and through plant watering and dish washing, both swatches stayed on really well without smudging.

Overall
I really like both products, they both have their pros and cons. Do I think the Revlon is a dupe for the MAC? Absolutely not, they simple aren't similar enough.
Is it a decent product in its own right? Yes, it could be very useful! 
While I love the MAC double-ended liner, both colours and the packaging- $27 is a lot of money. Technically it's $13.50 per side which isn't terrible for MAC, but it's still too much. 
The Revlon Smoky Shadow Stick is a great product that glides on smoothly, and wears well but the packaging is absolutely terrible. There is a great colour selection in these and if you want something like the MAC without the price tag, you could go for these. But be warned, don't expect to take it with you on a night out or travel with them. 
If you have ever tried the CoverGirl Smoky Shadow Blast cream shadow stick things, you know that both the cream product and the packaging was the just horrible. The cream product creased on your eyes in minutes and packaging broke just as fast. Both of these are better options but it depends on what you're looking for and what you're willing to spend. 
Personally I won't be getting anymore of the Revlon Smoky Shadow Sticks because bad packaging is a huge pet peeve of mine. But I won't be getting any more of the MAC Shadow/Liners either because they really are too expensive for what you're getting. For now, I'll still be waiting for drugstore companies to come out with a good cream base in a stick form.
Hope you enjoyed this comparison and review! As always thanks for reading,
-Tash <3

Monday, 30 April 2012

Avengers Series: Black Widow

Look at me, not failing at sticking to my blogging. I'm a winner and so are you (because you're reading it).
On with my Avengers series, which I highly doubt I will finish before the movie comes out but there's not hard in trying.
Tonight's attempt: Black Widow otherwise known to non-comic book readers as the hot, badass Scarlett Johansson plays in Iron Man 2.
I credit this photo as my inspiration as I am definitely not creative enough to have come up with this concept on my own.


Holy cow was this harder than the Hulk makeup. Jeebs. Okay first I started with my brows. I know I promised I'd do a thing on how to blank out your eyebrows but this look required black eyebrows, so it wasn't necessary for me. I will next time. Double promise. 
Filled in the eyebrows with a very dark black powder and concealed around the edges with a light concealer. 


Covered my lid with a black creamy base (limited edition from MAC called "Bat Cave"). WARNING: This product creases like no other. You can see it almost creasing in the photo and I JUST did the makeup. You are warned. 
Topped the base with the darkest black powder I have. This look requires a cut crease which for makeup n00bs is essentially when you have a stark contrast between the lid colour and crease colour with little to no blending. They are supposed to loon completely separate and defined. My orange wasn't super pigmented so it was hard to do this, but I tried. 
Above that I added a lemon yellow colour and again left it unblended. 
That's what I love about fun looks like this, you get to break all the so-called makeup rules.
I ran a concealer that is about 3 shades light for me under my eye to brighten my browbone area. 


Not gonna lie, love me some false lashes. These are the 109's from Ardell in black. and lined my lid with a gold glitter liner. I seriously have glitter everywhere now. Good lord. It also got all over my falsies, which I couldn't do anything about. Anyhoo, I rimmed my waterline, tightline and lower lashline with a black eyeliner (MAC "Feline" eye kohl) and added mascara.


Despite the face that it's really messy, I kinda like it. More to come with the Avengers!

Thanks for reading
-Tash <3 

Thursday, 26 April 2012

Avengers Series: The Incredible Hulk

Admittedly, this is a super nerdy thing to do but I'm going to do it anyway.
So begins the series of eye looks using colours from all the different members of the Avengers!
I started with Hulk because he's the easiest (only 2 colours) and I have to work out the problem of not having any red eyeshadow for Captain America or Iron Man.
Credit for this idea totally goes to this picture I found on the best time waster website in the whole world:
themetapicture.com


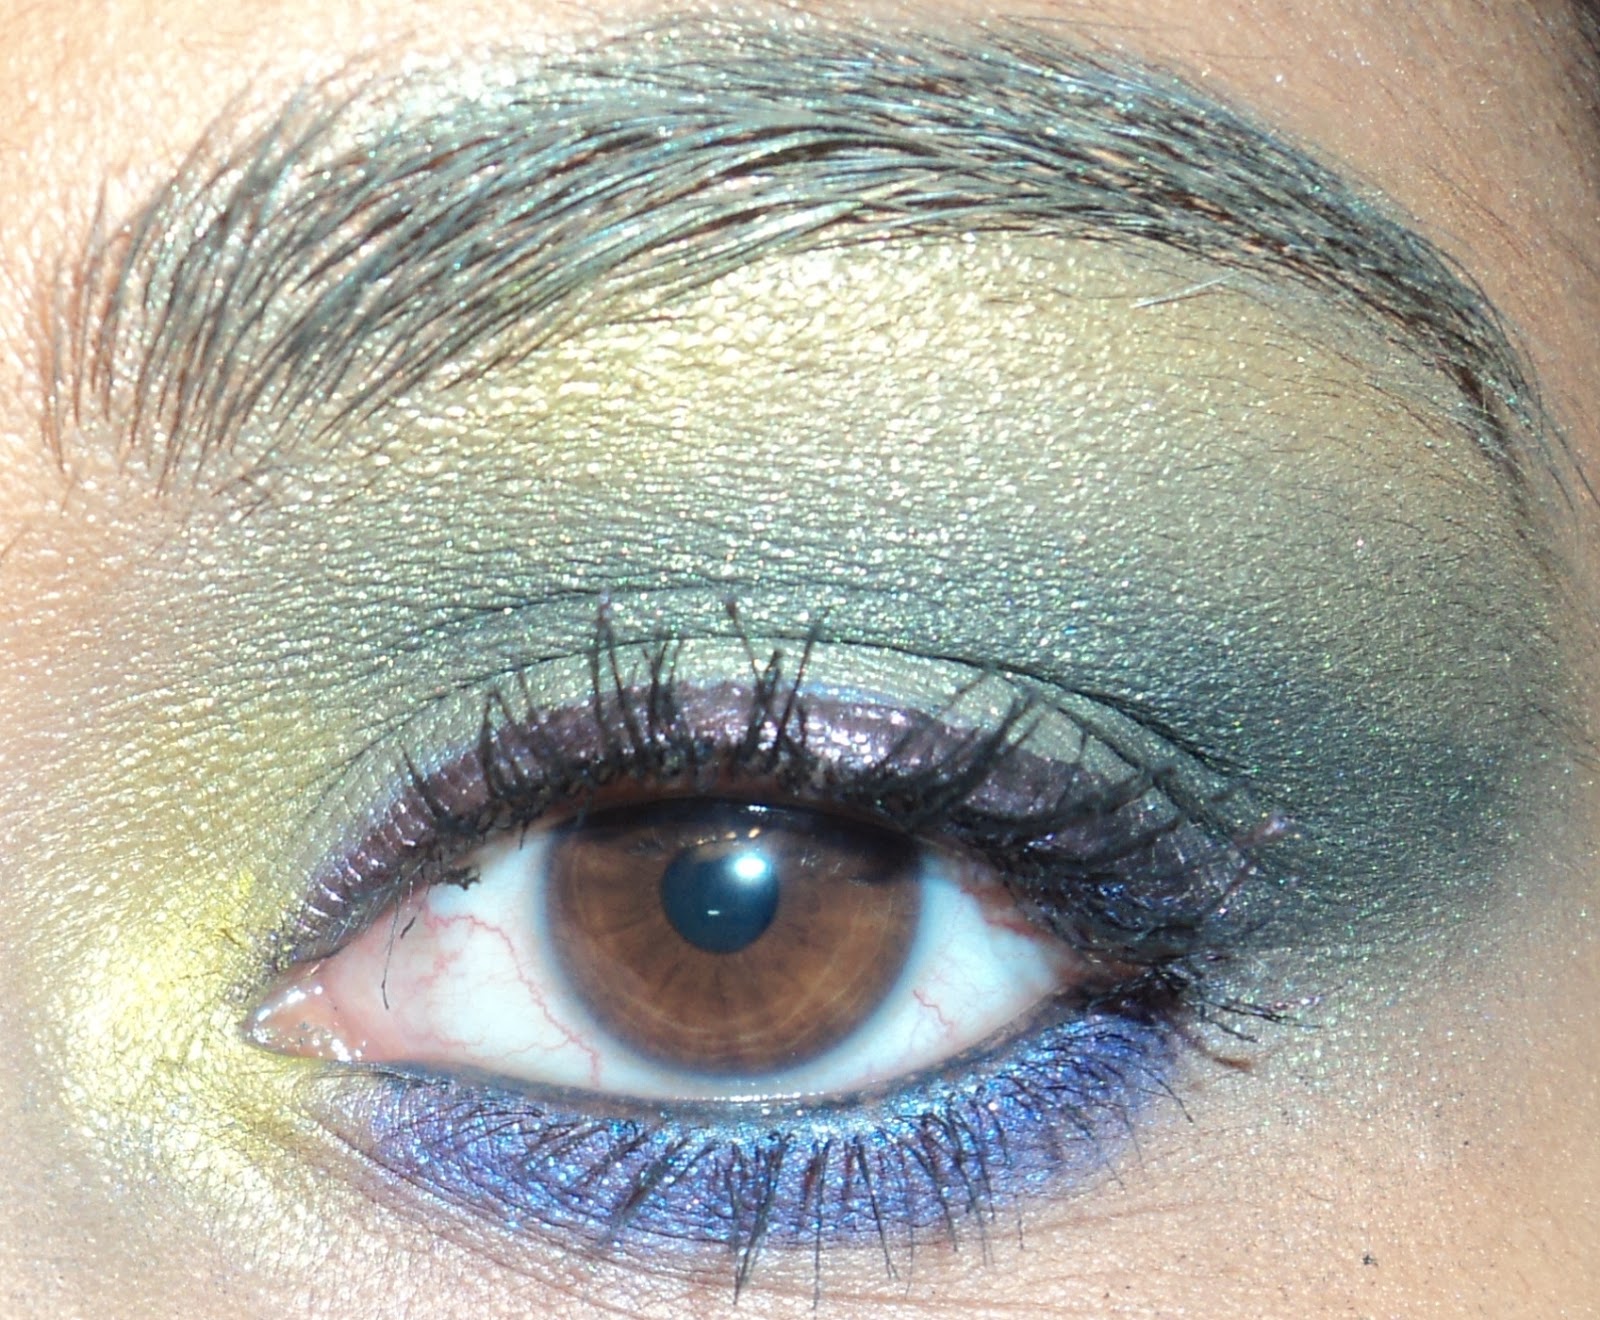
Obviously there's the green, so I graduated from a sort of emerald green on my lid to a darker forest green in the crease and blended it out with a lime green towards my browbone. I used a TINY amount of black to darken the outer corner.
Lined my top lid with purple liquid liner. 
I tried to blank out my eyebrows and fill them back in with green. I failed because I was missing something important. But I will get it for the next look and have a little "How to" section about blanking out your eyebrows. 


I put some of the same lime green in my inner corner to brighten it up a little. Then I just curled my lashes and added mascara. 


My lower liner looks blue in the pictures but I promise it's purple in person. I used "Ransom" 24/7 eyeliner by Urban Decay and topped it off with a purple shadow. I rimmed my waterline and tightline with a black liner and added mascara to my bottom lashes. 


And that's the Incredible Hulk from the Avengers in an eye look. Can you tell I'm excited for the movie?
Thanks for reading
-Tash <3

Friday, 20 January 2012

Stila Eyeshadow Palette: Review

Sorry about the hiatus people. School is just murdering me already...
So let's not talk about it and get straight into the review shall we?

I recently picked up the new "In the Moment" eyeshadow palette from Stila. I have owned Stila eyeshadows before and they were just "meh" for me. For example, I have the so described "cult classic" eyeshadow in "Kitten" that everyone and their mom is supposed to love. I wasn't loving it. 

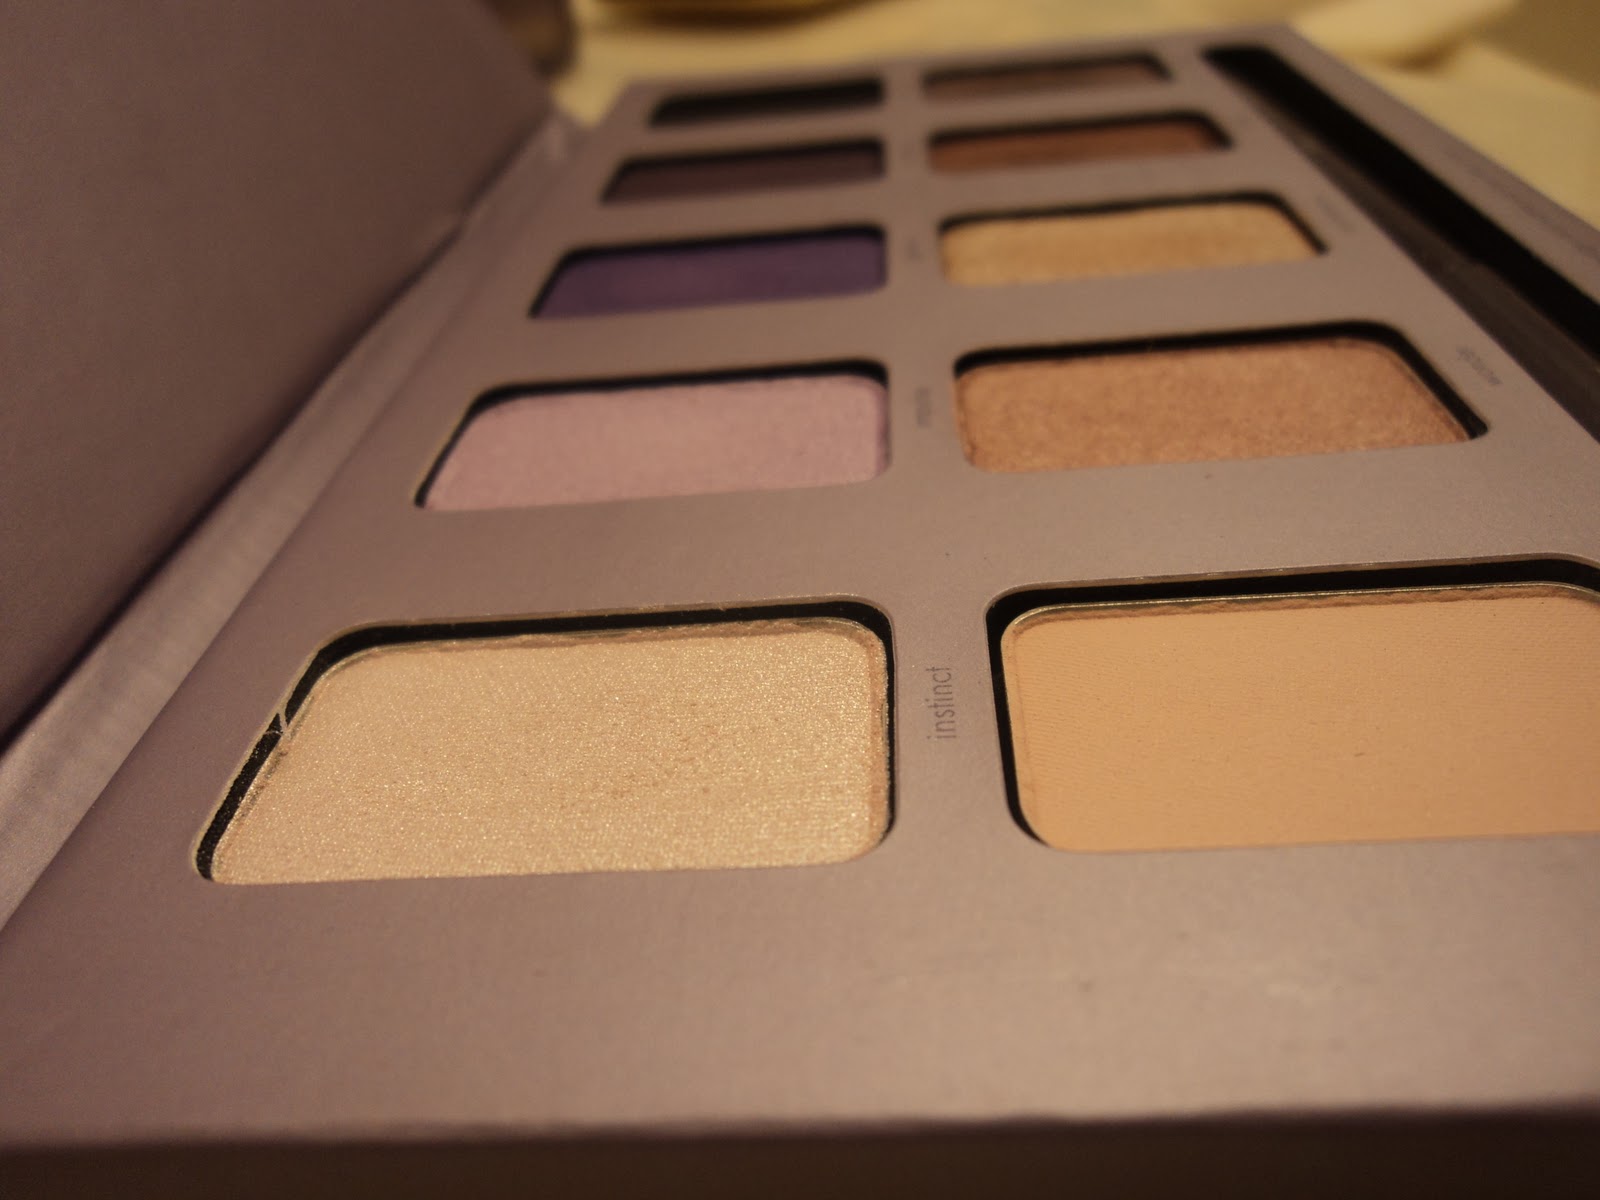
However I couldn't resist this new palette. It's the "In the Moment" palette and it has 10 eyeshadows total, some really great neutral, wearable shades and some really beautiful purples as well. The lid of the palette is magnetic and the case is very sleek and portable. 
The palette is $51 and it's available in stores Sephora or online at Sephora.com.


The shadows are great quality. All are very pigmented and they're very soft, almost creamy textures which makes them great to work with. 
From left to right (top row): Instinct, Impulse, Glance, Improvise, Catalyst
From left to right (bottom row): Desire, Wonder, Spontaneous, Whim, Captivate
I'm not sure if these shades are sold individually or outside this palette but I thought I would include the names just in case.


This palette also comes with a full-sized smudge stick in "Tetra" which is a very beautiful dark plum eyeliner with a light purple shimmer.
I have tried the smudge sticks before in "stingray" (black), "purple tang" (black with purple shimmer) and they are SO worth it. They are creamy, soft and some of the most pigmented liners I have ever tried and they are the automatic, twist-up kind which I love. Seriously, this palette is worth it for the liner alone.


A downside about this palette (if you care about this kinda thing) is that of the 10 shades, only 2 are matte colours- desire (light, pinky beige) and glance (deep purple). I personally don't mind that because the shimmer on some of the other shades is so subtle you barely notice it.


This is the inside cover of the palette. A quick google search tells me that Sarah Lucero is a makeup artist with Stila. 
This palette also comes with a "lookbook" which is a little book that shows you how to create six different eye looks with the palette. I thought it would be interesting to re-create one and see if the look actually turned out any good. Surprisingly, it did. The looks in the book are easy to do and range from subtle everyday looks to darker, smokier looks.


I chose to recreate the first look in the book called "wide eyed wonder" - it's the most wearable, subtle look suggested. I chose it because I was doing this before class one day and didn't want anything to overdone. I tweaked it to my own tastes so it's a little different from what it says in the book.


*Note: try not to judge the eyeshadows based on these photographs. I took them in bad light and only after many hours of wear. The "whim" colour in my crease is actually much darker but it gets washed on in the photos. Sorry!

I applied "wonder" all over my lid and blended "whim" in the crease of my eye.  
I blended out the dark brown colour with a skin tone shade (which would obviously vary for everyone).
I used "desire" lightly as a highlight on my browbone and in my inner corner. 
I also went back with the "wonder" colour but I used MAC Fix+ and used it wet right in the middle of my lid to make the colour stand out.
I used the "tetra" smudgestick that came with the palette for my liner.
I'm not positive but I think was wearing MAC "prep and prime" for lashes with L'oreal Million Lashes on top.

Overall: This palette is amazing quality and while $51 may seem like a lot, it's really a great deal.
10 shades divided by $50? Even a journalist can do that math, that makes each shade only about 5 dollars (not to mention you get a full-sized liner for $1).
If you're new to makeup and want a palette with neutrals that also offers some colourful options- this is a great place to start.
If you're kind of a makeup junkie like me with a huge collection, you don't necessarily need this palette but it is very useful and travel-friendly.  

Hope you enjoyed this post and thanks for reading guys!
-Tash <3