Thursday, 8 December 2011

Baking Corner: Santa Hat Chocolate Cupcakes

Yaaay for my first baking post!! :)
Up front disclaimer: I am not professional, or even kinda good at baking. I just enjoy eating sweet deliciousness and sometimes I have to bake it myself if I want it. But I'd like to share (what I call) accomplishments.


I saw this photo on a website and I was inspired to remake it. I love this, it's so pretty and festive, they look like little Santa Claus hats! I had no recipe, just the picture so I did the best I could and I adapted it into cupcakes to make it simpler. If you were interested in how I did it, here it is:


For the cupcakes, I just went lazy-style and used a box mix. I think I used the Betty Crocker "chocolate fudge" kind. Honestly, it really doesn't matter, you could use whatever you wanted. I just used chocolate to recreate the picture as closely as possible.

That small child you see in the background. Yes, him.
That is my brother, Kevin (in case you were wondering).
He helped make these!

 After I put the cupcakes in the oven, I washed and cut the tops off all the strawberries I needed. I put those aside and then I made the a cream cheese frosting.
This is by far my favourite cream cheese recipe:

Ingredients
4 ounces (113 grams) cream cheese, room temperature
2 tablespoons (25 grams) unsalted butter, room temperature
1/2 teaspoon pure vanilla extract
1 1/2 cups (175 grams) confectioners (powdered or icing) sugar, sifted
Instructions
In the bowl of your electric mixer, or with a hand mixer, beat the cream cheese until smooth. 
Add the butter and beat until incorporated and smooth. 
Add the vanilla extract and confectioners’ sugar and beat until fluffy (2-3 minutes). 
Pipe or spread the frosting on the cupcakes.
Garnish!
When the cupcakes come out, and I have learned this lesson many times, patience is a virtue. I always ice the frikken cupcakes too early and they get all melty and gross. Use a cooling rack if you have one and move them away from the oven.Wait until the cupcakes are completely cool before you spread a layer or two of icing on top. 


Once they're iced pop one strawberry, upside down, on the top of every cupcake. Then you'll need a piping bag to put the cute little icing-hat-tops on. DO NOT FRET, you do not have to go out and buy one. I will tell you how to make them!

How to make a piping bag:
Fold the tops of the bad over and spoon any remaining icing into the bottom of the baggie. 
Push all the icing to one of the bottom corners then twist the top until it's tightly closed. 
Use a pair of scissors and cut of that bottom corner.
*Important: begin with a small hole because while you can always make the hole bigger, you can't really make it smaller. So if you cut it too big to start with, you just kinda screwed.
Now hold the bag around the middle where the bulk of the icing is, apply even pressure and pipe away :)


 Last but not least, pipe a little icing on the tips of the strawberries to make the top of your "santa hat" and you are done! 


Overall: good cupcakes, AMAZING frosting. And strawberries are always a nice touch.
*Fair warning: If you're making these for a party or ahead of time- leave the strawberries of until last minute. After a while, the strawberries can leak red juice onto the icing, so make sure not to put the strawberries on too early or it will make the cupcakes soggy.

Just a Few Things...
  • I need a better name for my baking posts. I don't really like "Baking Corner" ... Any suggestions?
  • There is a giveaway happening by a great Youtuber names Erica!! You guys should subscribe, check her out and enter! Here's the link to the giveaway video: http://www.youtube.com/watch?v=IRTRTSFILZo&feature=g-u
  • I quite like baking, especially when I have time on Christmas break.
  • I am excited to make Pumpkin Spice Cupcakes at my Aunty Radica's baking party tomorrow.
  • I'm also making "Red Velvet Thumbprint cookies" tomorrow. Blog post on those?
  • I'm currently watching Storage Wars. This show is addictive. 

Thanks for reading!
-Tash <3 

Monday, 5 December 2011

Luxebox Review!

 Hello my lovely readers,
As promised, here is a blog dedicated to Luxebox for you all. Trust me, keep reading, it's an amazing opportunity!
If you don't know what Luxebox is, then you've been missing out!
Luxebox is a service by the company Loosebutton and when you sign up, they send a box filled with beauty and skincare samples to your door, every month!
The box is beautifully packaged and customized to you (which we'll get to later) and usually there are 4-5 deluxe sample or travel sized items for you to try.
You can just get it for one month just to try, or pay for a 3 month period. Or you can do it the way I do it, which is to pay month by month (I have had about 4 Luxeboxes at this point) and you have the option to cancel your subscription whenever you like.
It costs $12 a month, which in my opinon is SO worth it for what you get, and shipping is free, which is a nice plus.
If I have already piqued your interest and you want to sign up, go to their website!

To be honest, I can't rave enough about this service- I absolutely love it! It's like getting a birthday present every month. And they never cheap out on products or the packaging. I always get a very decent size of everything and they include brands that you would actually want to try as well. And it's just packaged so beautifully I can't bring myself to throw out the boxes. They're beginning to pile up in my bedroom...


Speaking of packaging, and you'll have to forgive mine since I've already ripped into it, your Luxebox comes with a sticker on the wrapping with your name on it! Wrapped up in tissue paper inside a open-faced box that slides out of another box.

The cute pattern of Loosebutton's logo on the inside the box!


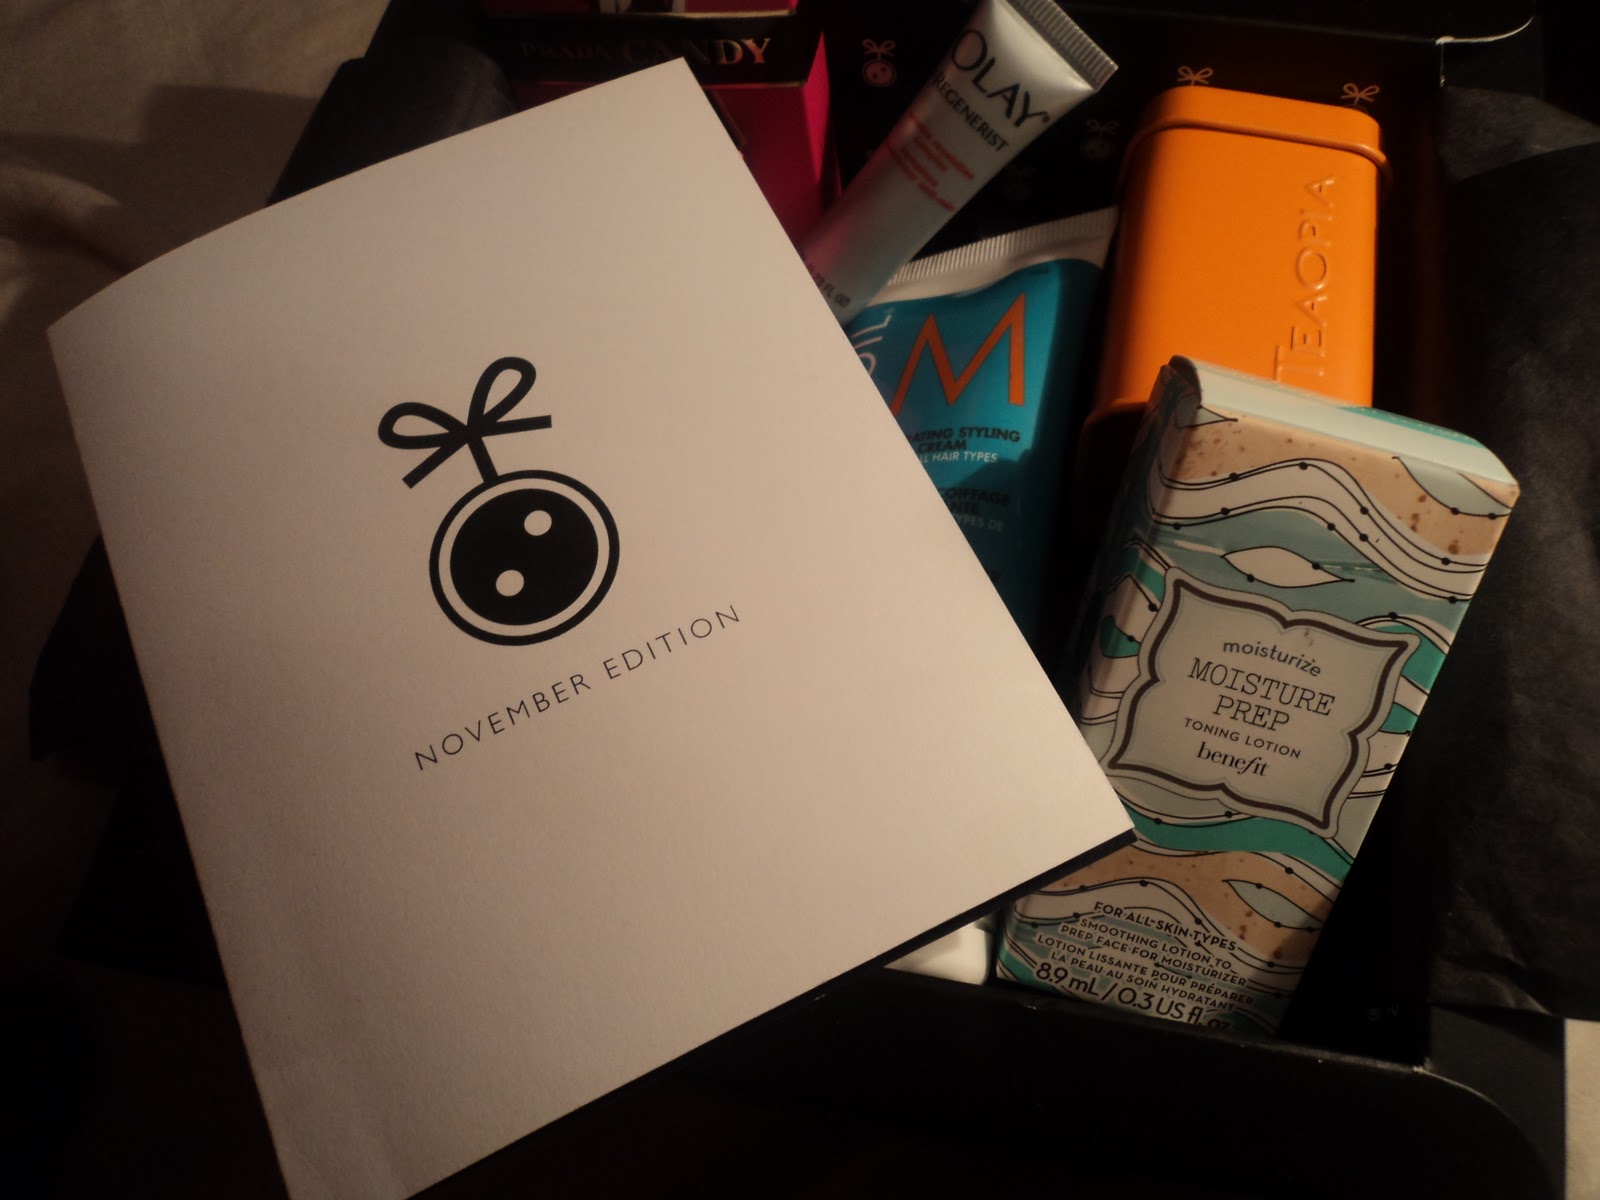
These are few shots of my November Luxebox (I am excitedly awaiting my December version!) It was full of wonderful items, I fell in love with a few and plan to purchase the full sizes. Every Luxebox also comes with a card from the company, describing the items you got, including what the full size of that item costs. 


 Items included in my November Luxebox: 
  • Prada Candy fragrance sample- Haven`t tried yet. I like to save these little sample perfumes for travelling. If it smells like the lotion (which I would assume it would, they're the same scent, duh) then I will like it.
  • Prada Candy Body Lotion- I`m terrible at describing scents but I can try. It smells sweet but not floral. More like a vanilla sweetness. It's also quite musky. I like it.
  • Morroccanoil Styling Cream- LOVE. So great, makes my hair manageable and smooth. Just love it for dealing with my thick hair and flyaways. Will repurchase
  • Benefit Moisture Prep Toning Lotion- More on this below, but LOVE and will repurchase.
  • Pur Minerals Neutralizing foundation primer- More on this below but also LOVE and will repurchase.
  • Teaopia Cactus Fig Tea Kit- unfortunately haven`t had the time to try it yet. Must do that soon.
  • Olay Regenerist face cream- Haven`t tried yet.

Woo, that was a lot to list. A lot of my Luxeboxes come with nice little bonuses. For example, the Prada fragrance sample, Olay face cream and Teaopia brewing kit were all bonuses in my box this month! One month I got a full sized China Glaze Crackle nail polish and another month there was a Hershey`s Kiss in my box. These little surprises are so fun and cute :)

Also I`d like to note the sizes. That Morroccanoil Styling Cream is HUGE, I won`t use it up for a long time. Last month I got the Morroccanoil Hair Treatment in my box, and I haven`t even used a quarter of the bottle since then. I am particularly happy about this because tiny little samples, that come in plastic packets don`t truly give you the opportunity to get a feeling for the product and decide whether or not you like it. These sizes last quite a long time and give you an opportunity to really get to know the product. Morroccanoil was a brand I'd been dying to try, but never did, as it was rather pricey. Luxebox has given me the opportunity to try two different things from the line. 


The Moisture Prep Toning Lotion is from Benefit Cosmetics new skincare line. Note: the bottle is empty because I couldn`t wait to blog and used it all up! I love this! It`s a toning lotion that you use on your face before moisturizer. It`s not like cleansing toners, that sting- it has a cool feeling. It is a water product but it has an almost gel-like consistency. It feels great and it really helps your moisturizer smooth on without pulling at your skin. I used this all November and I feel like it has brightened my complexion considerably. And quickly, I really love the packaging. The glass bottle it came in is beautiful, I will have to find something to use it for. I am definitely going to purchase the full size.


This is a great primer. It is smooth and creamy. A little goes a long way. Even with this small bottle, two pumps does my entire face, so it will take me a while to use this up. It helps foundation to smooth on and blend out over your skin so easily. The only downside is that it smells a little strange. The scent is not overpowering and it goes away in a minute (you don`t smell it one your face all day). But I find that most primers smell a little strange. Anyone else?

Candle burning in background: Slatkin&Co. Homemade Cookies
From Bath and Body Works. Best scented candle ever.
I can't wait to try this! I love tea :)


So long story short:
If it's not obvious, I love Luxebox so much! I think it's a great service at a very reasonable price. And if you love beauty as much as I do, Luxebox gives you a great opportunity to try out a wide array of brands that you might not otherwise be able to afford. Think about it like this. It's hard to go in and spend a lot of money on a product that you might not like. Luxebox helps eliminate some of the guesswork. 
This blog post sounds like a huge commercial for Luxebox but that's only because I really do love the service and everything it stands for. And if you haven't tried it yet, I suggest you try it, if only for a month.
Here's the link again, in case this blog post has convinced you.

http://luxebox.loosebutton.com/friend-sign-up?referrer=ZmFjZWY0MzY=

 The products you get are great quality and worth much more than you pay. It'll be the best $12 you ever spent.


Just a Few Things...
  • This post was a lot more work that I initially thought it would be. Much like blogging in general is a lot more work that I thought it would be.
  • My dog just loves sitting on my feet. He weights like 80 lbs. at least. My feet are always numb.
  • God I love this "Homemade Cookies" candle from Bath and Body Works. So much. I have to pick up some more soon.
  • Slept past noon today since I'm off school finally. Makes me so happy. 
  • Found my red glitter from MAC. Holiday look soon?? :)


Thanks for reading!
-Tash <3 


Tuesday, 29 November 2011

Holiday Nails (Post #3): Sparkling Red Wine!

WHAT UP.
Another blog post?!?!?! Crazy right??
I am so on the ball. I have done it again (I am aware it's not even December yet and this is my third holiday nails post).
I used two polishes, both from the new "Spice it Up" 2011 Holiday Collection. I main colour I used was "552 Spice it Up" and I used "530 Glitz and Glam" as an accent of glitter on my middle nail.

Candle burning in the background: Slatkin&Co. Creamy Pumpkin
from Bath and Body Works (in the metal holder with snowflakes on it).

"Spice it Up" is a cranberry-burgundy red which is a great holiday colour. It has a gold shimmer in it that catches the light beautifully. I just love this nail polish, just looking at it reminds me of Christmas decorations and I get this cozy feeling inside. It's not at all a "gothy" dark tone, it's very elegant- it actually looks a lot like red wine. The best part? See how deep the colour is? ONE COAT. This only took me one coat to get it that opaque. WHAT? I don't even have OPI polishes that can do that! This is definitely going to be a staple in my nail polish collection, I absolutely love it (not to mention it's a great price).


"Glitz and Glam" is a fine pink glitter in a deep purple, almost burgundy base. The base colour is very close to "Spice it Up" so it layers over top very nicely (I haven't tried it on its own yet, so I can't attest to how many coats it would take to be opaque on its own). It creates a great accent nail. When layered over a dark red, the glitter takes on an almost red appearance so it blends right in and doesn't look out of place. 


Alrightey, that's it for this holiday nails post! These are a lot of fun to do.
I honestly can't wait for Christmas.
I need the time to finally relax a little and spend some time with my family. 
Thanks for reading!
-Tash <3

Monday, 28 November 2011

Holiday Nails (Post #2)- Chestnuts About You!

I am so proud of myself- for keeping up my blogging lately.
I SHOULD be doing homework right now, but that seems to be the only time I can effectively blog-
when it's really important for me to be doing something else.
I thought I'd share a quick post in my "Holiday Nails" series.

This polish is also from the Sephora by OPI holiday collection called Glimmer Wonderland and it's called "Chestnuts About You" which is such a cute name, I had to name the entire post after it.


I love this nail polish! It's a beautiful gold that shines pink. 
It applies beautifully because it's a very smooth polish, semi-thin polish.
But even though it's thin, still only took me two coats to get it opaque.


Despite being a pink-gold colour, this is actually really great for everyday wear. Whereas my first holiday nail post was very dramatic, this is a really beautiful almost neutrally type colour that you could wear all year, not just around the holidays.
Plus, without all the chunky glitter from the last post- this lasts about 94709482943 times longer without chipping.

Just a Few Things...
  • I found out today that my friend Breanne, has read some of my blog posts, so YAY someone is actually reading these!! Hey Breanne, if you're reading!!! :)
  • I'm considering doing Blogmas (where you blog everyday in December) which is crazy because I know I will fail, but that doesn't mean I shouldn't try... right? 
  • I seriously need to replace my digital camera. The lens won't even open properly anymore, geeeez.
  • Nail polish photographs so much easier than makeup, holy crap.
  • Is it cheating if I blog some pictures of makeup looks I did last year but never posted? I don't think so... :s


Saturday, 26 November 2011

MAC Holiday Collections: Haul, Photos and Review!

Hello again friends!
Today is the day! What day? The day I review the items I have gotten so far from the MAC holiday collections. I have 2 palettes from the "Ice Parade" collection and one paint pot from the "Glitter and Ice" collection (however there are a few that are on my Christmas wishlist so that may change). The quality is great on all these items but I thought it would be a good idea to show some pictures and review them a little more in detail.

*Side note: I cannot do swatches yet. I just don't have the right lighting conditions and I'm never free to take the pictures when there is still enough natural light. So swatches are a work in progress for now. 


All the palettes have a little snowglobe on top!!!


From left to right: 6 Snowglobe Eyeshadow Palette in "Warm", paint pot in "Let's skate" 
and the "Festive Frost Face Kit"
Left side: Winterscape, Patina, Gaelic Gold
Right Side: Magical Mist, Buckwheat, Midnight Flurry
I quite enjoy this palette. It's definitely great for every day use, as it's filled with neutrals. My favourite shade in the palette is "Gaelic Gold", it has to be one of the most unique golds I have ever come across. I also like that this palette includes "Patina" which is actually in the permanent collection. Patina is hard to describe, it's kind of a taupey-brown which makes it a great neutral.

My only complaint would be about the top left shadow "Winterscape" while in the pan it looks beautiful- it comes off rather chalky and that makes it hard to work with.


Firstly, I have to say I'm bias with this one, because I truly love MAC paint pots. I have "Indianwood" and  I use it daily. They never crease on me, they last all day and they're super pigmented and creamy which makes them easy to work with.

So when I saw that the holiday collection included some new limited edition colours I knew I was going to pick one up. "Let's Skate!" looks pink in the glass pot but actually comes off more white with a gold iridescence.

The important thing to mention about this product though, is not the colour but that it has a TON of sparkle in it. Not shimmer or shine- legitimate glittery sparkle. I can already tell that this would put most people off, but that friends, is a mistake. I just touch my finger in it and spread across my lid- instantly makes any shadow brighter. Or use it for night and pack it on. But it's something to think about because the sparkle can make it a little more difficult to use regularly.

Left: Once Upon a Time, Expensive Pink
Right: Below Zero, Embark

Blush: Buff

This may be my favourite item that I own from the holiday collection. It's great for doing your makeup quickly because every shadow you need to create a look is included. A nice light colour for the lid, a bronze for the crease, a pink to warm up the look and a really dark brown to intensify the outer edge. I should mention that "Embark" and "Expensive Pink" are permanent collection colours. (I actually wore expensive pink to my prom!)

The packaging is unique, which I like. The eyeshadow quad slides over to reveal a blush underneath. At first I didn't think I would like this blush, but it's gorgeous. A pinky-nude that just blends right into my skin, perfect for avoiding the "racing stripes" blush look (not pretty). 

Overall Impressions:
As always the pigmentation on these is great, the same as the regular, permanent collection stuff. I found a new love with that blush (I will have to find out if it's limited edition, if it is, I will be sad). 
It is true that the packaging is a little too over the top and bulky with this collection. Personally, I love the snowglobes on the front (they're totally fun to play with). They only stick out maybe 1 cm over the top of the palette, however, I would still be very wary of travelling with these. Because that if one of those breaks- that is a HUGE mess to clean up.

Just a Few Things...
  • These pictures took forever! Appreciate people.
  • AHH only one more week of school for me, so excited to be off and spend some time with my family!
  • Hopefully soon I can find the time to blog some Christmas looks soon.
  • Also going to do a wishlist blog post soon! Hopefully Jon reads it... 
  • Also expect a Luxebox blog post soon, LOVE luxebox 
  • Currently reading "The Girl with the Dragon Tattoo" and I'm about halfway through. Not seeing what all the hype is about. It's a little boring actually. Hunger Games still miles and miles better. 
  • I would love a nice warm cup of tea right now but my dawg is sitting on my feet and I don't want to disturb him

Wednesday, 23 November 2011

Holiday Nails (Post #1): Gold Rush

Hello makeup-lovers,
I am dutifully trying my best to keep this little blog-o-mine going. It's not easy (as is probably obvious from the time of night that I'm writing this) but nevertheless I'm trying.
I thought I would do a quick holiday nail polish post.

I get into Christmas and the holiday season SUPER early and dear god, it irritates anyone and everyone who knows me. Seriously, the second week in November, we had our decorations up at my house and I broke out the festive nails! I love festive/holiday/Christmas themed nails. I would say maybe a quarter of my entire nail polish collection. which has become rather large (maybe a nail polish collection blog?) is either a holiday colour OR it came directly from a holiday collection.

I decided I wanted to go all out with my nails and do a gold base with a glitter overlay just on the top parts.
I think it came out really nice!
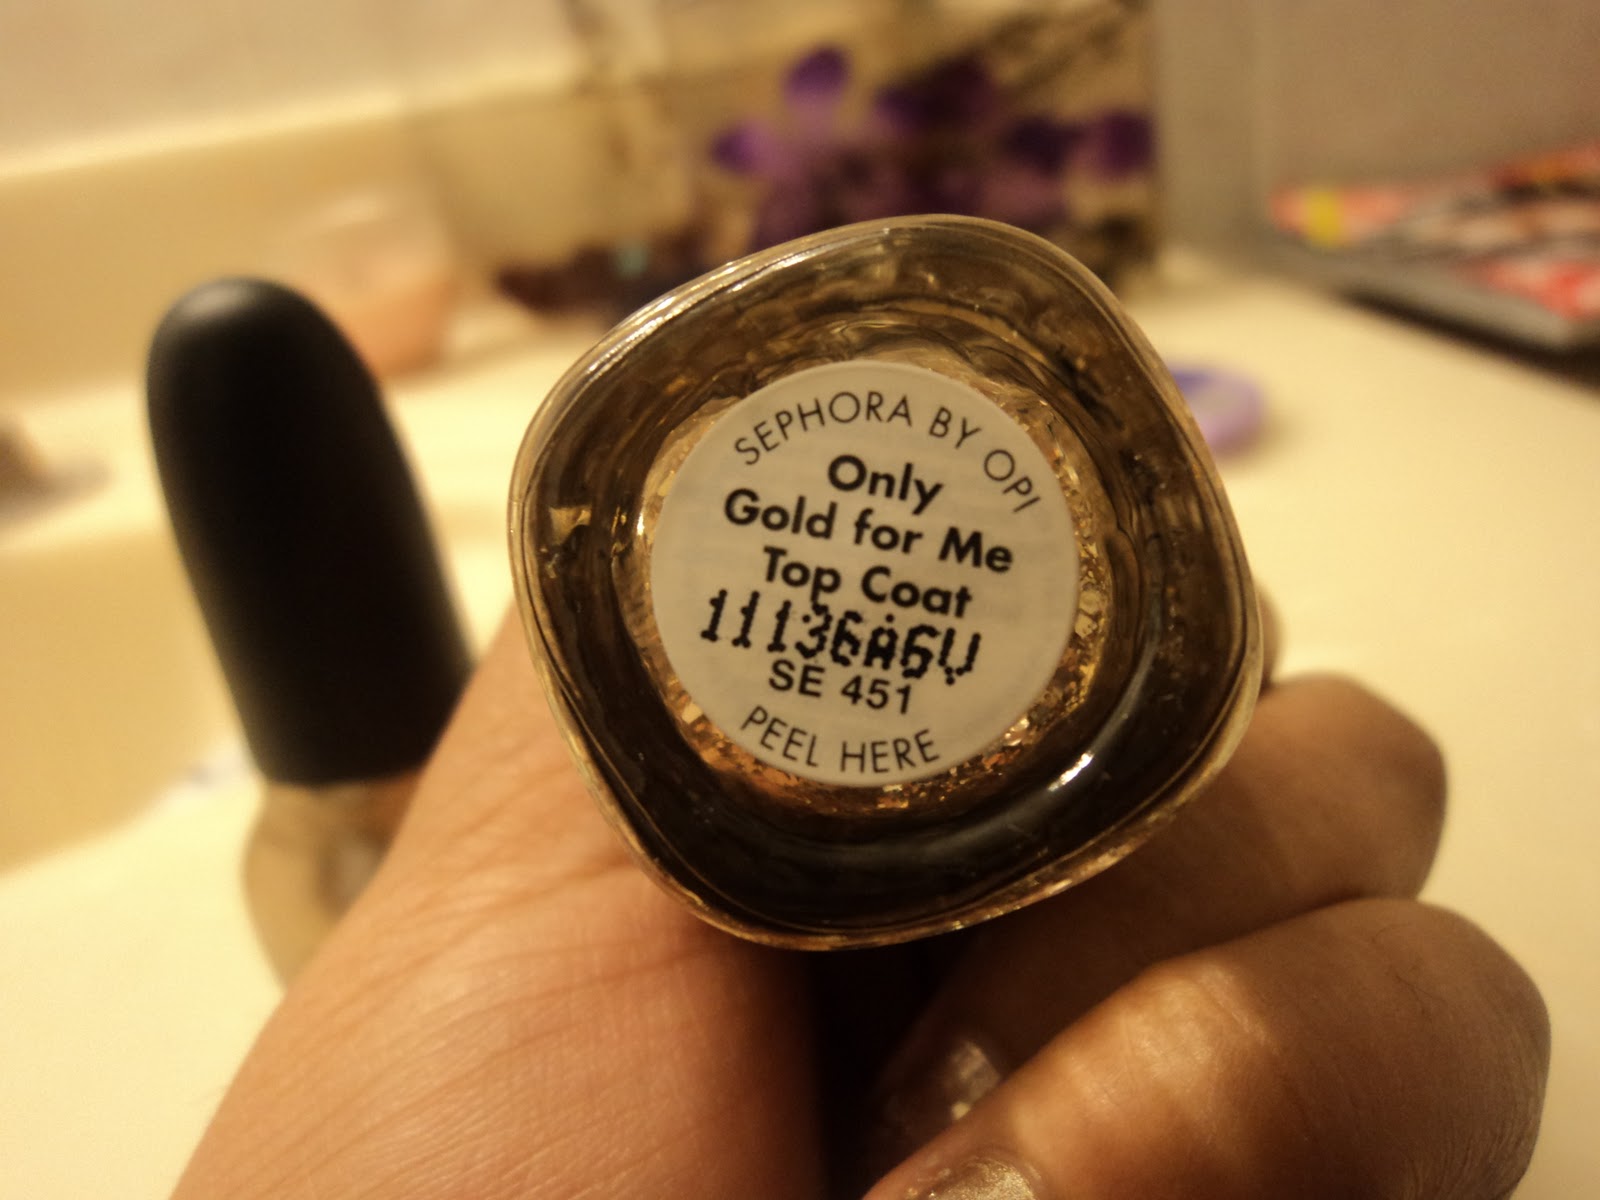
I used two OPI by Sephora colours.
The base gold is called "Keep Me on my Mistletoes" and it's from the OPI Glimmer Wonderland Collection 
The gold glitter polish is "Only Gold For Me Top Top Coat" which I believe is a permanent colour.


I only did the glitter right near the tops of my nails so
 it almost looks like a glitter french manicure! 
Tip: Try not to create a harsh line with the glitter. Fade it downward.

Both these polishes are very smooth and opaque.
 You barely need two coats of "Misteltoes" to get the job done.
It has a smooth, shiny formula. It's gorgeous and subtle worn alone. 
The glitter top coat spreads nicely (for a glitter polish) and is surprisingly easy to work with.


Just a Few Things...

  • I know all my posts have been super quick, short posts lately. However I do have a post coming up soon about the things I got from the MAC Glitter and Ice Holiday Collection! 
  • Makeup swatches are difficult to photograph because I blog at night and have zero suitable lighting.
  • I forsee many more festive/holiday nail posts- I do love my Christmas colours (I have another one already photographed).
  • Picked up the holiday issue of Chatelaine and I think I will try out some of the recipes :)
  • I have no idea what to get my dad and Jon (my boyfriend) for Christmas, boys are so hard to shop for. Poo.
  • I am so close to being done this semester. So. Close. 
Thanks for reading!
-Tash <3

Monday, 14 November 2011

Bold Lip of the Moment: "Rebel" by MAC

Hello all!
I just wanted to update. I have failed at blogging for a while- but school is crazy for me right now.
I just wanted to share a bold lip of the moment with you all.
Rebel by MAC is a beautiful lipstick- it looks dark purple in the tube but when worn it looks like a bright fuschia pink/purple colour. It's extremely bright, so it's not for the timid- but it is totally worth the risk!
Try it out, you may surprise yourself!


 Just a few things...
  • Yea, I take pictures in my bathroom- lighting's best in there... don't hate.
  • Blogging requires commitment, something I need to work on.
  • Exactly 17 days until I get off for Christmas break, WOOT.
  • Tonight's episode of How I Met Your Mother was so sad- but so good!
  • I am already coming up with holiday themed looks in my head...